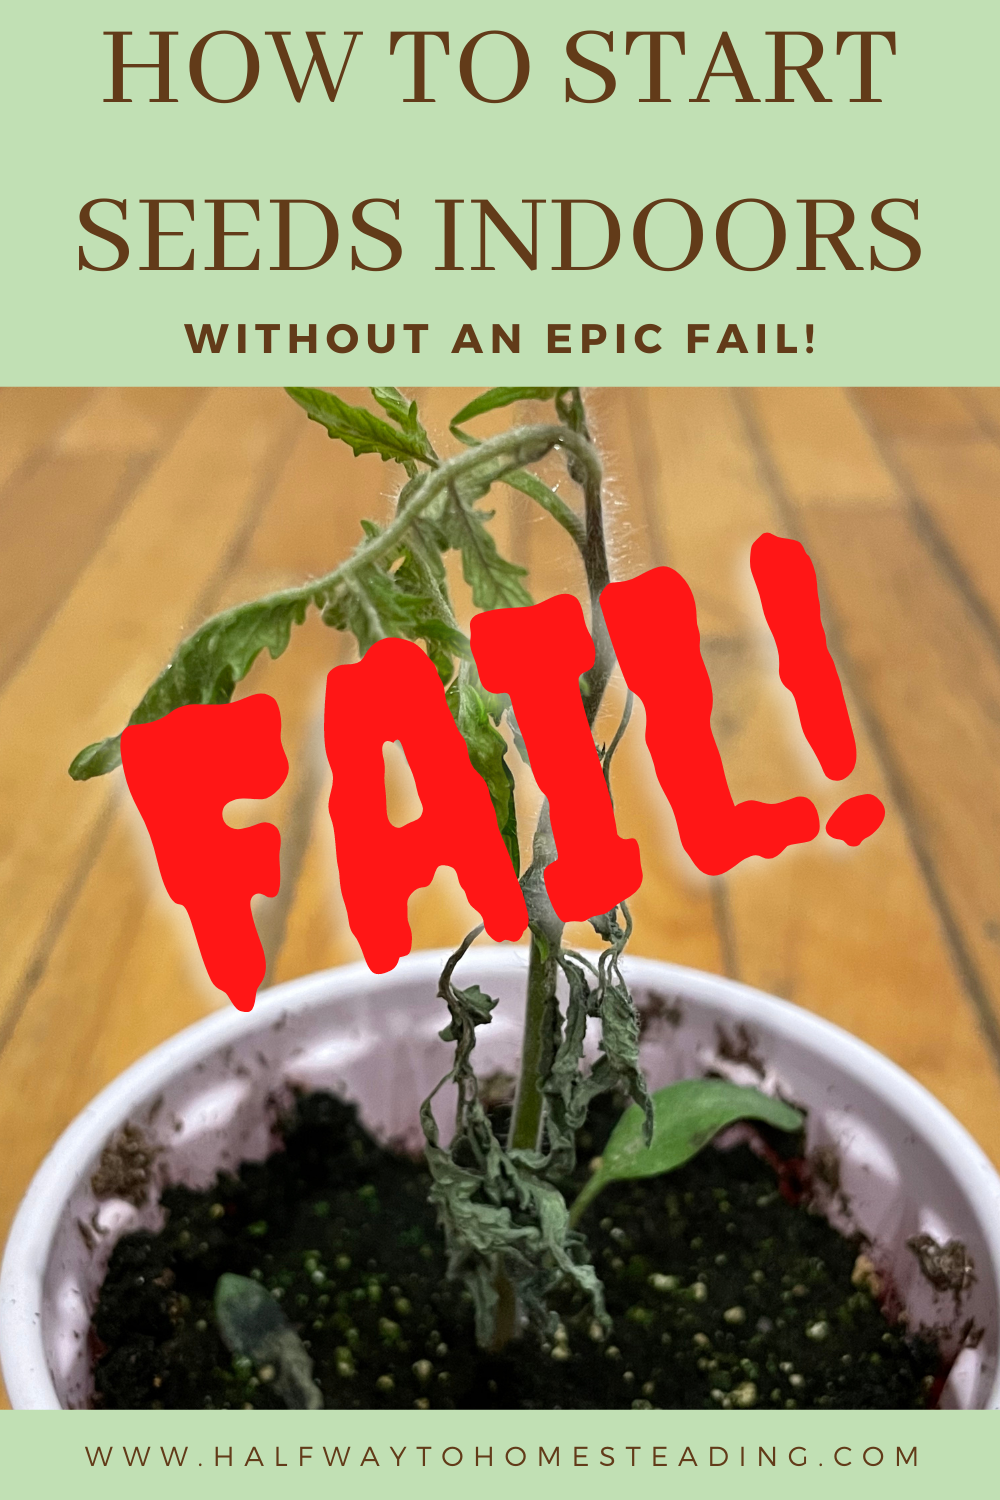
How To Start Seeds Indoors ~
Without An Epic Fail
Are you a newbie wondering how to start seeds indoors? Or have you tried in the past, had thriving seedlings, then suddenly they withered away before getting the chance to transplant them outside?
Either way, you’ve come to the right place!
Here are some tips and a step by step, on how to start seeds indoors, that will help give your crops a great start while preventing the most common mistakes.
*Disclaimer-Affiliate links are included below. As a Tractor Supply and Amazon Associate I earn from qualifying purchases.
1.PLAN AHEAD!!!
There was so much that I wanted to share with you, that I decided to break this up between two posts getting prepared and the actual planting stage.
Planning and preparation is the foundation of a successful garden.
Check out our Starting Seeds Indoors: Getting Prepared post for info on:
Location and Set Ups
Lighting
Seed Starting Mix vs. Potting Soil
Growing Container Options,
What to Plant Indoors vs. Direct Sow
How Many to Plant
When to Plant, and More!!
Ok, we have all of the seed planning out of the way…Let’s get planting!!
2.Dampen your seed starting mix/soil
Dampen starting mix/soil with hot water and mix well BEFORE adding it to your growing containers. We want it damp, but crumbly, and not wet where you have to squeeze it out (for a 12 Qt. bag of seed starting mix we add a gallon of hot water).
Mixing well is key for the starting mix to absorb the water! We learned this the hard way hence the emphasis! A common mistake is putting the dry mix in the containers, adding seeds, THEN adding water and finding that the mix won’t absorb the water, ending with seeds floating out of holes and poor germination rates.
3.Fill containers
Add starting mix/soil to growing containers and gently tap the bottoms against a hard surface, to shake down and to fill in any large gaps. Seed starter mix is so fine and light, that after a few weeks, you’ll look and the cup will be only half full. It compacts down, so we fill them almost all the way up to the top from the start.
4.Planting Depth-READ YOUR SEED PACKETS!
This is not only important for knowing planting dates, but they usually also provide very specific directions on how deep to plant the seeds.
Not all seeds are planted at the same depth. This could range from just sprinkling them on top and pressing them into the soil to putting them in an inch deep hole.
Not following these directions could greatly affect their success in germination.
5.How many seeds to plant
Number of seeds per cell or cup also depends on what you are planting. Usually you’ll plant 2-3 seeds per cell/cup in hopes that at least one will successfully germinate.
However, some packets will say to plant a cluster of 5 seeds or “sprinkle on top of soil”. So, again, it’s important to read those seed packets! If the packet doesn’t say, then I usually will go with 2-3 seeds each.
If planting in larger cell trays or Solo cups, I try to space out my seeds slightly making two separate holes instead of putting them in the same hole, especially for Tomatoes and Peppers. We find that separating the seeds a bit, decreases root damage when it comes time for “thinning” (which we’ll get to) and allows for easier transplanting if you want to try to save the seedlings that get plucked.
6.Cover seeds gently with soil/mix
Follow seed packet directions for how to cover seeds.
7.Label each container
Troy and I prefer to label each cup/container instead of just the entire tray, if using containers that aren’t connected. We find that as the plants grow we are constantly shifting and moving them depending on height and lightening needs.
8.Lightly water
Once planted and labeled, lightly water, using a spray waterer if possible. Sprayers don’t disrupt the seed’s positioning like pouring water over top could.
Seeds need constant dampness. They won’t germinate if they are wet then dried out then wet again, however they shouldn’t be sitting in a pool of water either.
Water balance is everything in gardening and I think is probably the biggest challenge.
Soil/mix should feel like a damp sponge, but not soggy or WET.
9.Cover with plastic
Cover growing containers loosely with plastic Saran wrap or clear plastic domes, if you had purchased them.
This will help keep the seeds damp and act as a mini greenhouse for watering. Plastic is only for germination. Remove once seedlings have emerged.
10.Shelving heights
Troy and I learned quickly that it’s important to plan shelving height according to what we are planning to grow, AND to organize plants on the shelves according to eventual height.
If you have a shelf of low growing cucumbers with high growing tomatoes, you’ll find yourself raising the lights to accommodate the tall guys and the low plants will end up stretching for the light which causes weak stems/plants.
11.Light heights
While I’ve read many blogs that say that light is not needed for the germination stage, I again refer to my seed packets and some actually say “intense light needed for germination”. So like most things there is no “one size fits all” approach when it comes to gardening, and really depends on what exactly you are planting.
We tend to automatically use lights for this stage, as well, and have had great success.
If you are using a window for light, be sure to rotate/turn your plants often, once they emerge, as they will grow leaning and stretching toward the light.
You aren’t going to like what I have to say about artificial lighting. Spending hours and hours reading about lighting heights with seedlings, I found all sorts of very confident directions and guidance.
Some swearing by having the lighting 2-4 inches above the plants and others swearing by 12, 18, and 24 inches even..ugh!
It all depends on wattage and lumens of the specific lighting fixtures that you purchased and there is no definitive black and white answers that I could find that aren’t royally contradicted by someone else.
Whatever lights you choose, read as may reviews as you can to see if they suggest a certain distance.
We went with Barrina LED 4ft (6pack) Grow Lights and keep the lights 3-4 inches above the plants. We use chains and keep raising the links as the plants grow.
Regardless of the light you choose, keep an eye on your plants and take heed to their warning signs.
Signs of too much light – This could be that the lights are too close or that they are on for too long of a duration at a time.
Brown leaves.
Leaves curling upward, like a taco.
Wilting.
Yellowing of leaves (this could also mean a nutrient deficiency)
If you start noticing these signs, try adjusting the lights higher. Also keep track of how long the lights are on them (recommended 12-16 hours each day), and scale back if you have been leaving them on for the higher end of that time range.
12.TEMPERATURE
Each seed type is different but most between 68 and 86 for germination.
BUT…
READ EACH SEED PACKET!
We wondered why our Apocalypse Scorpion Pepper had such a poor germination rate. After reading the packet (too late!), I saw that they need 85-95 degrees for germination. I’m confident the problem we had was because they didn’t have enough heat.
Once seedlings emerge usually 70-75 is a nice temp. Then after first set of true leaves form, start lowering temp to about 60 degrees, if you are in that much control of the room’s temperature that is!
Those numbers are ideal to the perfect growing set up, however it gets tricky when you have tall thriving seedlings in the same room where seeds are still germinating. In that case, try to find a happy medium with temps leaning in favor of germinating seeds.
Another possible solution to different temp needs when having plants growing at different stages, is finding your warmer spots/shelves. We are growing in our basement and using a space heater. The 2nd shelf from the bottom is our warmest so that is my 1st go-to spot for germinating seeds. Then, the more developed seedlings are set up in the cooler spots on the shelves.
13.Watering
Have you heard of the saying “When in doubt, DON’T!”? Well it applies to watering! HARDLY DO IT!
Probably 99.9% of seedling failures are from OVERwatering. I’m making up that percentage, however you get the idea!
If you think to yourself “Maybe I shouldn’t water today.” Then go with your gut and DON’T!
Again, soil should feel like a damp sponge and not wet or soggy. During germination, constant moisture is key. However when it comes to formed seedlings, don’t let the soil/staring mix totally dry out but let it become ALMOST dry between watering.
When seeds are germinating, watering from the top with a gentle sprayer is ideal.
Once seedlings have emerged, bottom watering is preferred to encourage roots to grow deeper as well as to avoid overwatering by allowing more of a “wicking effect” to occur as the soil draws up only what it needs.
Bottom watering is when you pour water into the bottom watering tray that the containers are sitting in. Being that the containers have holes in the bottom, they will pull up the needed water.
This method still has a bit of a learning curve, because you don’t want them always sitting in water. Ideally you’ll be giving them as much as they will actually drink.
When seedlings are small, there doesn’t need to be a lot of water in the bottom of the tray but as they grow especially cucumbers and tomatoes, you’ll notice that they will drink up quickly.
Now here’s where, once again, there are differing opinions. Personally if I check the plants an hour or two after watering them and there is still a significant amount of water in the trays, I dump the water. Some people do this after 30 mins, some an hour, some not at all.
I feel that while it’s a pain in the butt to dump trays, the plants do much better and it’s well worth the extra effort.
The only time that I would allow excess water to remain in the trays is if we are going to be away for a few days and want to make sure they get watered.
Signs of overwatering Seedlings
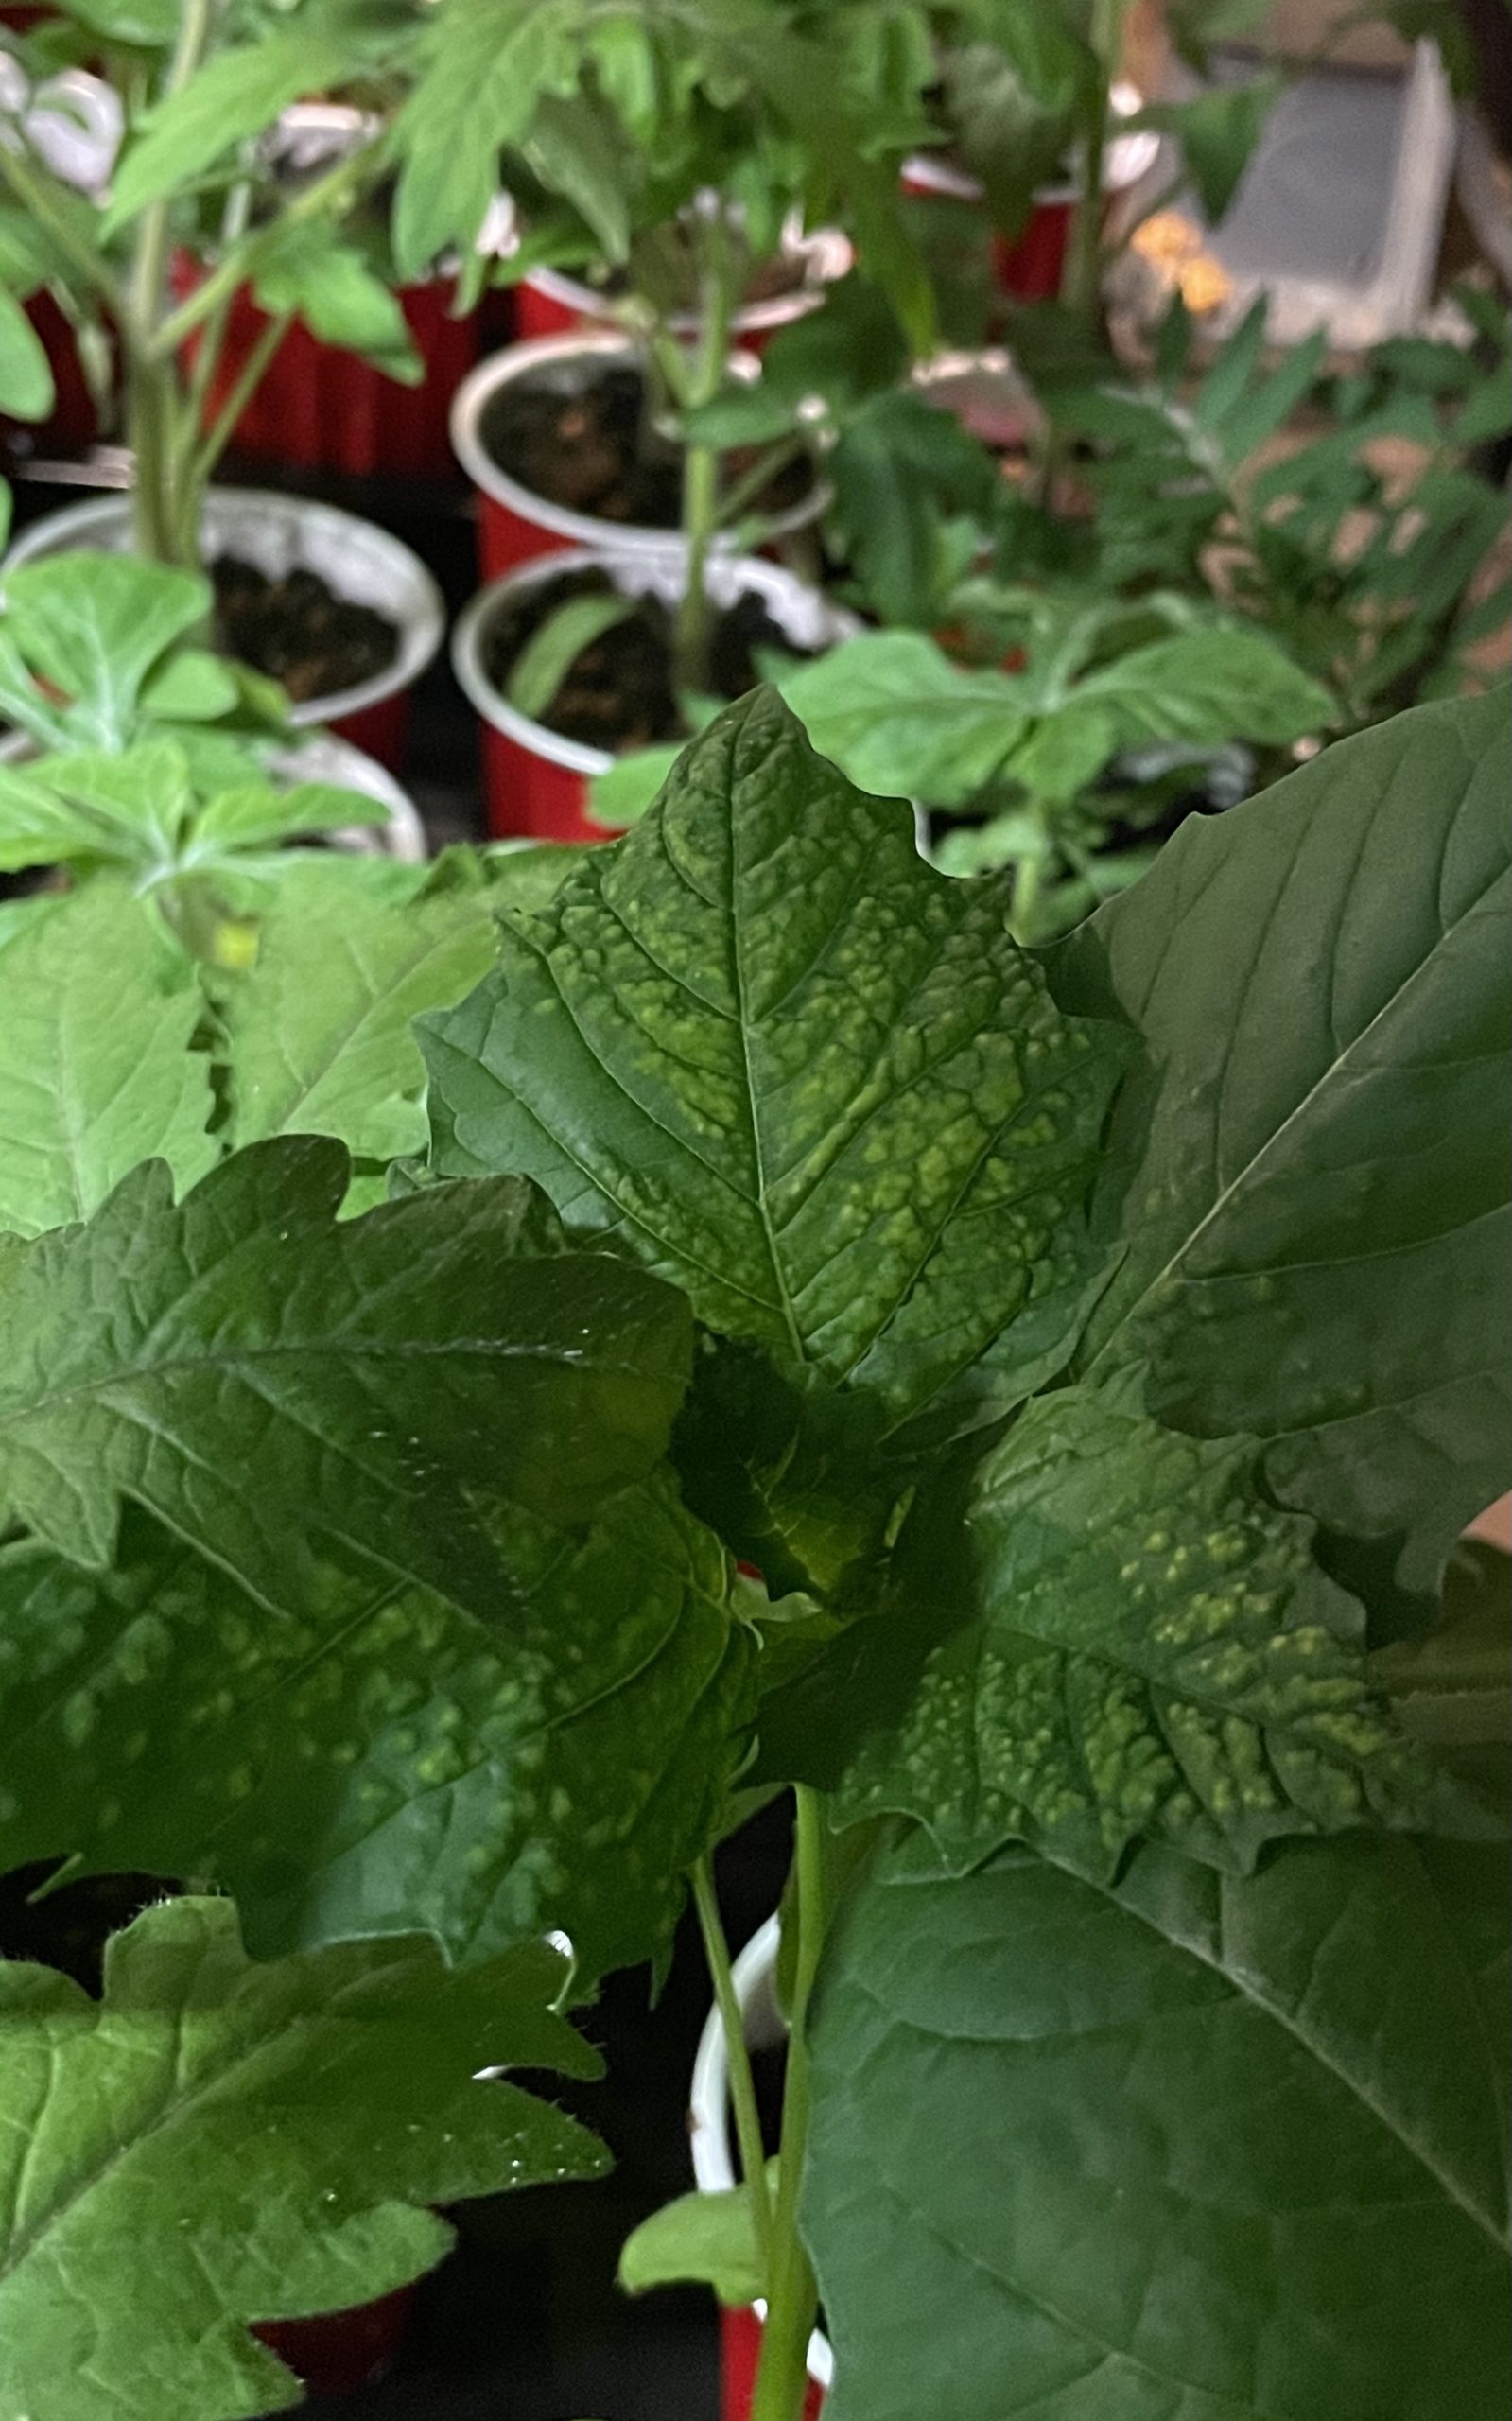
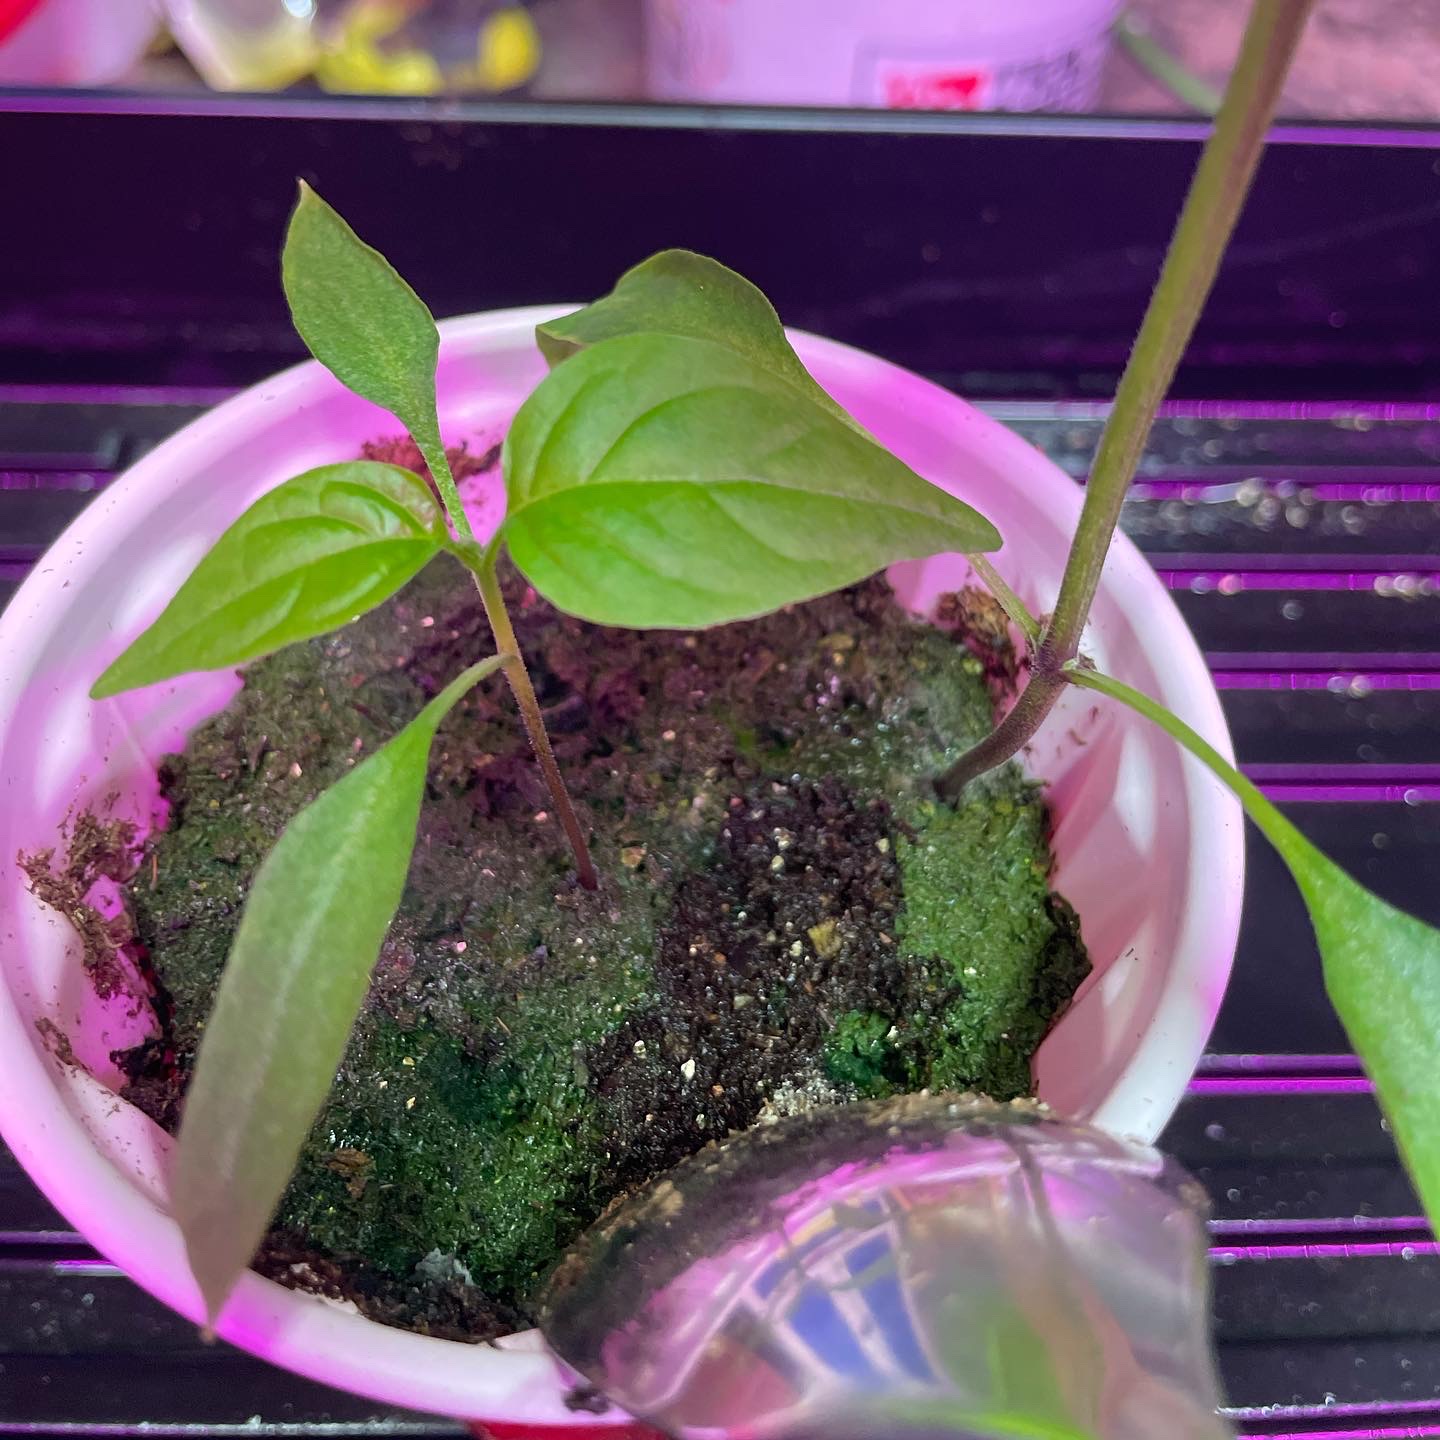
Leaves are soft and limp.
Leaves turning brown and/or wilting but soft to the touch (if crispy and dry feeling they are probably getting too little water or too much light)
Blistering leaves- These are actually formed by cells bursting from too much water. They are often described as blisters, warts, lesions, or edema. (1st pic)
Leaves falling off- The very first seedling leaves will eventually fall off. However if you notice newer leaves that were just looking healthy suddenly fall off, this could be a sign of over watering.
Green Slime Algae growing on top of soil. (2nd pic) This is easy to overlook until you turn off the grow lights and it glows! (Yes, I totally keep singing “Ice Ice Baby” whenever I see this!) Some say to sprinkle on top if you notice this. We’ve done that but I’m not sure if it did much to help, to be honest.
If you notice any of these warning signs, put growing containers into dry trays and avoid watering for a couple-few days. Always check the soil (stick your finger gently into the side of the container about an inch) moistness BEFORE watering.
Remember: We want it to feel like a damp sponge and not soggy or WET.
14.Fertilizer
As I explain in our Starting Seeds Indoors: Getting Prepared post, if you use Seed Starting Mix, instead of soil, then you will need to fertilize after the seedling’s first set of “true leaves” (which are their second set of actual leaves) have formed and each week after that until transplanting them to an actual soil.
Start by diluting ¼ of what the package recommends, since we are dealing with such young seedlings, and each week add a bit more. So if it says add one scoop to a gallon of water, start by making it ¼ of a scoop to a gallon of water, then ½ scoop the next week, ect…
We love Miracle Grow’s Organic Line.
15.Thinning
Once seedlings have 2 sets of “True Leaves” (3 sets of ACTUAL leaves), they will need to be “Thinned” out if you have more than one growing in the same cell/cup. This is when you narrow it down to just one plant per cell/cup, so that they aren’t competing for nutrients.
Of course there are exceptions to the rule, like with Peppers. If you have a large enough starting container or transplant to a larger one, peppers prefer growing with a partner.
When thinning seedlings, keep the healthiest, straightest seedlings and pinch off or snip the other seedlings in the container.
This is EXTREMELY difficult for many gardeners. Up till now we have nurtured these seeds turned seedlings and now we have to pick and choose which ones are worthy enough to survive till harvest.
Life is cruel and so is gardening!
What if ALL of the seedlings look strong and healthy??
This is why I mentioned above that I space seeds out, when able, instead of putting multiple in the same hole.
Some plants do better with transplanting than others. Tomatoes and Peppers, we have had tremendous luck transplanting and saving seedlings that we had to thin.
To do this, gently pinch at the very base of the plant and pull slowly straight up. If you get decent roots to pull up with the seedling, then you should be golden to replant!
Cucumbers and melons don’t do as well with this (though we HAVE done it successfully, their roots are different and tend to get more damaged and the plants take a long time to recover IF they recover at all).
When all is said and done, though difficult mentally and emotionally for some people, the next day you will be happy that you thinned them. You’ll be AMAZED at how much better the remaining healthy seedlings will grow and thrive almost instantly!
16.Potting up
“Up Potting” or “Potting up” is when you transplant seedlings to a bigger container, allowing roots to grow healthy instead of forming a knot around the base.
This is usually done when the seedling has at least 1 or 2 sets of “True Leaves”, and depends on how small of a container you started with. If growing in the small cell trays, you will definitely have to pot up!
Transplant into containers that are twice the size as the original.
Use a quality potting soil, and NOT a seed starting mix this time.
When transplanting tomatoes, either by “potting up” or final transplanting, bury them up to at least their first set of leaves so that more of their stem is covered with soil this time around. Many gardeners will actually bury 2/3 of the plant! Tomato plants will grow roots off of any portion of buried stem.
More roots + Deeper roots= Stronger plants!
17.Hardening Off- DON’T RUSH PAST THIS STAGE!
So we have healthy, beautiful seedlings and the weather is warming up. We wait for our average last frost date and plant the next day, right?? WRONG!
Seedlings need to go through a “hardening off” period, so that they could get acclimated to the change in temperature, environment, and even used to the strength of the wind and rain.
Start 1-2 weeks before you intend to plant outdoors.
Set seedlings outside in a partially shaded (NOT direct sun)spot for an hour the first day. Make sure temps are above 45 degrees Fahrenheit and not windy or rainy. Remember we are gradually acclimating them and not shocking their systems.
Each day increase the amount of time that they are outside by an hour.
On day 4, start easing them into a sunnier location for part of their time outdoors.
Once they have been well acclimated to the day and temperatures are above 50 degrees Fahrenheit at night, they could spend the night outside. (This is referring “in general” to warm weather plants and not cool hardy ones)
18.KEEP AN EYE ON THE WEATHER FORECAST
When we reach our average last frost date, it doesn’t mean that we are in the clear and could plant outside the very next day.
Keep in mind that this date is just an estimate. Watch your weather forecast carefully right before you plant outside and well after, as there are almost always unexpected straggler nights with frost. When that happens, no need to panic because you will be aware and prepared to cover plants as needed to protect them!
 About Me
Aaaaaaaaand I see now exactly what I’ve been doing wrong!! (Thank you!) I mean, wow… so many of these I was doing wrong!! And I can’t believe I didn’t see it, lol. Example… putting my tiny little oregano seeds in the pot THEN watering, only to find my seed washed off to the side somewhere. Okay. This post is a game-changer, girl, thank you so much for sharing!
Yes, exactly!! (re washed off seeds). I’m so glad that you found this helpful, Stacey! Thank you so much and happy planting!!